Table of Contents
Dreaming of landing those epic tricks on your own half pipe? With a little planning and effort, building a diy half pipe can become a reality. kizworld is here to guide you through every step of the process, from gathering the right materials to mastering the construction techniques. Let's get started on creating your very own backyard skate haven!
Feature | Details |
|---|---|
Planning | Determine size, location, budget, and get necessary permits. |
Materials | Plywood, 2x4 lumber, concrete, screws, nails, etc. |
Tools | Saw, drill, tape measure, level, safety gear, etc. |
Construction | Frame the half pipe, install plywood surface, add coping (optional). |
Safety | Wear protective gear, supervise children, inspect regularly. |
Planning Your DIY Half Pipe
Location, Location, Location!
First things first, where are you putting this awesome half pipe? You'll need a good chunk of space, so measure it out! Think about sunlight too – nobody wants to be skating in a sauna all day. A flat, well-drained area is key for a stable ramp, kinda like choosing solid ground for a tent! You don't want your ramp wobbling like a jelly mountain.
Size and Budget – Dream Big, Plan Smart
How big of an airtime dream are we talking? A smaller ramp is great for beginners, while seasoned skaters might want more vertical. Once you've got the size down, it's time to talk budget. Check out prices for plywood, lumber, and screws – those are the building blocks of your ramp. It's like making a shopping list for the coolest LEGO creation ever! Don't forget to factor in safety gear too – a helmet is a must-have! You can find some awesome tips on skateboarding gear in our article on skateboarding helmets and pads.
Size | Skill Level |
|---|---|
Mini Ramp (Under 3ft) | Beginners |
Mid-Size (3-6ft) | Intermediate |
Vert Ramp (6ft and up) | Advanced |
Planning Your DIY Half Pipe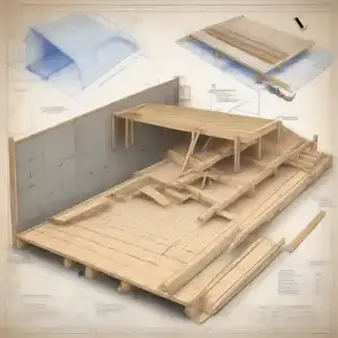
Building a DIY Half Pipe: Materials and Tools
Alright, let's talk supplies! Building a half pipe is like putting together a giant puzzle, and you need the right pieces. For the ramp's curve, you'll need plywood – think of it as the ramp's skin. To support that skin, grab some sturdy 2x4 lumber – these are your ramp's bones. And of course, we need to hold it all together, so stock up on screws and nails. Don't forget safety gear! A helmet is a must-have while you're building and when you're showing off your skills. You can find some awesome tips on protective gear in our article on skateboarding helmets and pads.
Building a DIY Half Pipe: Materials and Tools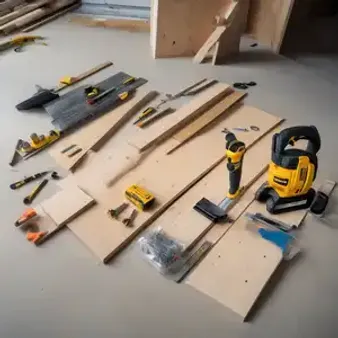
Constructing Your DIY Half Pipe
Now for the exciting part – putting it all together! It's like building a giant skateboard ramp puzzle. First, you'll build the frame using your 2x4s, making sure it's super strong and secure – you don't want any wobbly bits! Next, you'll carefully attach the plywood sheets to the frame, bending them to create that awesome curved shape. Ever tried bending a piece of paper to make a curve? It's kinda like that, but on a much bigger scale! You might need a friend to help you hold things in place. This part can be a bit tricky, so take your time and don't be afraid to ask for help if you need it.
- Coffee
- Tea
- Milk
Constructing Your DIY Half Pipe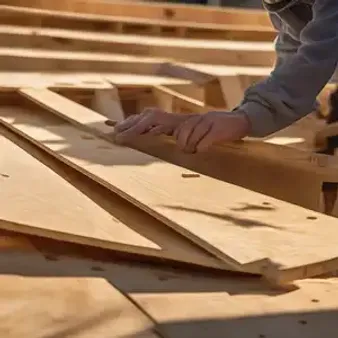
DIY Half Pipe: Safety Tips and Tricks
So you're about to have your very own half pipe – that's awesome! But before you start shredding like a pro, let's talk about safety. Just like you wouldn't ride a bike without a helmet, you shouldn't hit the half pipe without the right gear. We're talking helmet, knee pads, elbow pads – the works! Think of it like a superhero suit for skateboarding. You can find some awesome tips on protective gear in our article on skateboarding helmets and pads.
And remember, even pros wipe out sometimes. It's all part of the learning curve! So start slow, get comfortable with the ramp, and gradually work your way up to those gnarly tricks. Maybe practice a few ollies on flat ground first before you go airborne. Remember, it's all about having fun and pushing your limits, but safety always comes first. If you are looking to up your skateboarding game, check out this article on how to do a 180.
Inspect Your Half Pipe Regularly
Imagine you're building a castle out of pillows – you'd want to make sure those pillows are still fluffy and in place, right? Same goes for your half pipe! Over time, the wood can warp, screws can come loose, and things can get a little wonky. That's why it's super important to give your ramp a regular check-up. Look for any cracks in the wood, loose screws, or anything that just doesn't seem right. You can even give it a little test bounce (with your safety gear on, of course!) to make sure everything feels solid. Taking care of your half pipe means it'll last longer, and you'll have way more time to shred!
Start Small and Work Your Way Up
Ever tried to eat a whole pizza in one bite? It's not easy, right? Same goes for skateboarding! Don't expect to be pulling off crazy stunts on your first try. Start with the basics – getting comfortable dropping in, carving back and forth, and finding your balance. Once you've mastered those, you can gradually work your way up to more challenging tricks. It's like leveling up in a video game – you wouldn't fight the final boss without gaining some experience first, would you? For some inspiration, you can check out this article about Louie Lopez, a skateboarding legend.
Level | Tricks |
|---|---|
Beginner | Dropping in, carving |
Intermediate | Ollie, rock to fakie |
Advanced | Kickflip, heelflip |
DIY Half Pipe: Safety Tips and Tricks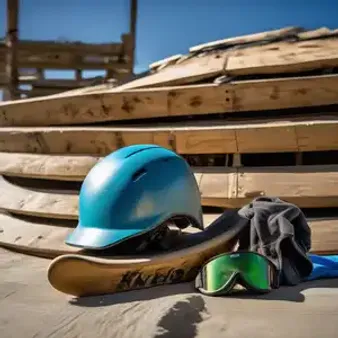
Final Thought
Building a DIY half pipe is an incredibly rewarding project that lets you bring the thrill of skateboarding right to your backyard. Remember to prioritize safety throughout the process, and don't hesitate to get creative with your design. Now grab your tools, gather your materials, and get ready to shred on your very own custom-built half pipe!