Table of Contents
Welcome to Kizworld, your trusted guide to mastering basic gymnastics skills. Gymnastics, a captivating sport demanding agility, strength, and grace, awaits you. Whether you're a novice gymnast eager to make your mark or an enthusiast seeking to refine your technique, kizworld provides a comprehensive roadmap to success. Embark on this journey with us as we unveil the secrets to mastering fundamental gymnastics skills, overcoming challenges, and reaping the transformative benefits of this exhilarating sport.
How to Master the Basic Gymnastics Skills: A Comprehensive Guide for Beginners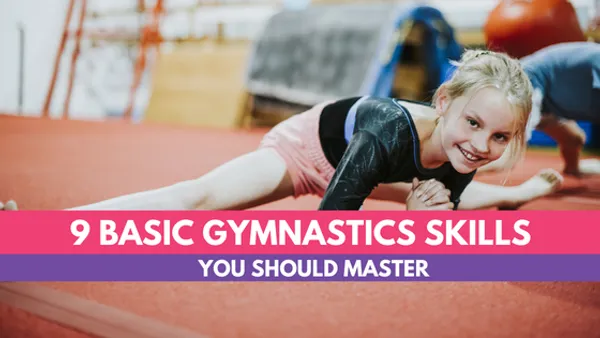
I. Mastering Cartwheels: A Step-by-Step Guide
Mastering Cartwheels: A Step-by-Step Guide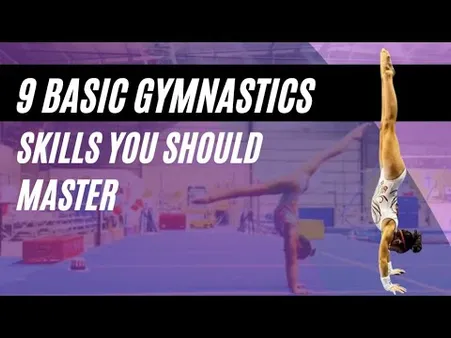
Laying the Foundation: Understanding the Basics
Cartwheels, a fundamental gymnastic skill, demand coordination, agility, and body awareness. Mastering this move requires a solid understanding of its components. The cartwheel comprises three distinct phases: the preparation, the handstand, and the landing. Each phase plays a crucial role in executing a smooth and controlled cartwheel.
In the preparation phase, gymnasts assume a lunge position with one leg forward and the other leg extended backward. The arms are raised overhead, creating a straight line from the fingertips to the toes. This position generates momentum and prepares the body for the handstand.
The handstand phase marks the apex of the cartwheel. Gymnasts swiftly transfer their weight onto their hands, propelling their legs upward in a vertical position. Maintaining balance and control during the handstand is essential for a successful cartwheel.
The landing phase concludes the cartwheel. Gymnasts gracefully lower their legs, returning to a lunge position similar to the preparation phase. The arms are extended forward to absorb the impact and maintain stability.
Phase | Description |
Preparation | Lunge position with arms raised overhead |
Handstand | Swift weight transfer onto hands, legs extended vertically |
Landing | Graceful lowering of legs, returning to lunge position |
Conquering the Cartwheel: A Step-by-Step Approach
Mastering the cartwheel requires patience, practice, and a systematic approach. Follow these steps to break down the skill and build confidence:
- Start with Preparatory Drills: Begin by practicing the lunge position and arm movements without attempting the full cartwheel. This helps develop the necessary coordination and body awareness.
- Progress to Handstand Holds: Once comfortable with the preparatory drills, start practicing handstand holds against a wall or with a spotter. This builds strength and balance in the inverted position.
- Master the Kick-Over: The kick-over is a crucial component of the cartwheel. Practice kicking one leg over while maintaining balance on the other leg. This movement helps generate the momentum needed for the handstand.
- Combine the Elements: Once proficient in the preparatory drills, handstand holds, and kick-overs, start combining these elements to perform the full cartwheel. Practice in a safe environment with a soft landing surface.
- Refine Technique and Build Confidence: With consistent practice, you'll refine your technique and build confidence in performing cartwheels. Gradually increase the difficulty by practicing on different surfaces and in different environments.
Remember, mastering the cartwheel takes time and dedication. Be patient with yourself and celebrate each small achievement along the way.
Safety First: Essential Tips for Cartwheel Success
Safety is paramount when learning and practicing cartwheels. Follow these tips to minimize the risk of injury:
- Choose a Safe Environment: Practice cartwheels in a safe and controlled environment with a soft landing surface, such as a gym mat or grassy area.
- Warm Up Properly: Before attempting cartwheels, engage in a thorough warm-up routine to prepare your muscles and joints for the activity.
- Start Slowly: Begin with preparatory drills and handstand holds to build strength and confidence before attempting the full cartwheel.
- Use Spotters: When first learning the cartwheel, consider using spotters to provide support and guidance.
- Listen to Your Body: Pay attention to your body's signals. If you feel pain or discomfort, stop immediately and consult a healthcare professional.
By following these safety guidelines, you can minimize the risk of injury and enjoy the process of learning and mastering cartwheels.
With dedication, practice, and a focus on safety, you can conquer the cartwheel and unlock new possibilities in your gymnastic journey.
How to Do a Handstand: A Comprehensive Guide for BeginnersThe Benefits of Gymnastics for Kids: A Path to Physical and Mental DevelopmentThe Best Gymnastics Equipment for Home Use: Creating a Personal Training Space
II. Conquering Handstand: Techniques and Safety
Conquering Handstand: Techniques and Safety
1. Master the Building Blocks:
Lay the foundation for a stable handstand by developing wrist, shoulder, and core strength as well as body awareness. Start by practicing the wall handstand to build confidence and work towards a freestanding handstand. Read more: How to do a handstand
- Wrist Flexibility: Utilize wrist-strengthening exercises like wrist push-ups and stretches to enhance flexibility and power in your wrists.
- Shoulder Mobility: Work on shoulder flexibility and strength through regular yoga or mobility training, ensuring proper form to prevent injuries.
- Core Strength: Train your core's strength by incorporating exercises like planks, Russian twists, and bodyweight leg raises into your routine.
- Balance and Coordination: Practice balance poses in yoga or standing on one leg to build body awareness.
2. Perfect Your Technique:
Mastering a handstand involves maintaining proper body alignment. Begin with a comfortable hand placement, shoulder-width apart, and align your shoulders directly above your wrists. Keep your core engaged and legs straight for a stable and vertical position. Read more: The best gymnastics exercises for core strength
- Posture: Stand in front of a wall; with your back facing it, place your hands shoulder-width apart and walk your feet up using the wall's support. Aim for a 90-degree angle between your legs and torso.
- Body Alignment: Maintain a straight line from your head to your heels. Engaging your core will help keep your body stable.
- Hand and Arm Positioning: Spread your fingers wide to create a solid foundation. Keep your arms straight and your elbows locked.
- Legs and Toes: Keep your legs together with toes pointed and ankles flexed.
3. Conquer the Fear Factor:
Fear is a common obstacle in handstand training. Approach it by breaking down the skill into smaller achievable goals, starting with the wall handstand. Gradually increase the distance between your feet and the wall as you progress. Read more: The most common gymnastics injuries and how to prevent them
- Confidence Boost: Use a spotter for extra security until you feel comfortable. As you grow stronger, rely less on support.
- Positive Thinking: Visualize yourself performing a perfect handstand successfully. This mental imagery can build confidence.
- Celebrate Progress: Recognize every milestone you achieve on your handstand journey. Your persistence will pay off.
- Breathing Techniques: Practice deep breathing exercises to manage fear. Controlled breaths can help calm your nerves and maintain focus.
4. Safety Measures for Success:
Ensuring a safe environment is essential for handstand training. Make sure your practice area is padded with mats, ensuring a soft landing if you lose balance. Wear appropriate gymnastic attire, including leotards or shorts that offer flexibility and grip socks or shoes for safety and control. Read more: The best gymnastics equipment for home use
- Quality Matting: Opt for well-cushioned landing mats to reduce impact force and minimize the risk of injuries.
- Proper Attire: Wear well-fitted gymnastic attire made from comfortable and breathable materials. Ensure it provides adequate coverage to prevent chafing or wardrobe malfunctions.
- Grippy Soles: Wear grip socks or shoes designed for gymnastics. These provide better traction and stability when performing handstands.
- Spotter Support: Work with a spotter, especially during handstand progression. Their assistance ensures safety while attempting advanced variations.
III. Perfecting the Backbend: Flexibility and Core Strength
Perfecting the Backbend: Flexibility and Core Strength
The backbend, a fundamental gymnastics skill, demands both flexibility and core strength. Achieving this pose requires dedication and a step-by-step approach. Begin by warming up your body with dynamic stretches, focusing on your hamstrings, lower back, and shoulders. Incorporate exercises like the cat-cow pose and the child's pose to increase spinal mobility.
Next, work on your flexibility by performing static stretches. The seated forward bend, where you reach your toes while keeping your legs straight, is an excellent stretch for your hamstrings. To improve your lower back flexibility, try the supine pigeon pose, where you bring one knee to your chest while keeping the other leg extended. Hold each stretch for at least 30 seconds, breathing deeply.
In addition to flexibility, a strong core is crucial for maintaining proper form and balance during the backbend. Engage in core-strengthening exercises such as planks, side planks, and leg raises. These exercises target your abdominal and back muscles, providing the necessary support for your spine.
As you progress, gradually increase the intensity of your backbend practice. Start by performing the bridge pose, where you lie on your back and lift your hips, forming an inverted V-shape with your body. Hold the pose for a few breaths, focusing on keeping your core engaged and your lower back pressed into the ground.
Exercise | Benefits |
Cat-cow pose | Improves spinal mobility and flexibility |
Child's pose | Stretches the lower back and hamstrings |
Seated forward bend | Improves hamstring flexibility |
Supine pigeon pose | Improves lower back flexibility |
Plank | Strengthens the core and abdominal muscles |
Side plank | Strengthens the obliques and core muscles |
Leg raises | Strengthens the lower abdominal muscles |
Bridge pose | Strengthens the core and lower back muscles |
Once you've mastered the bridge pose, advance to the wheel pose, where you arch your back and support your weight on your hands and feet. This pose requires significant flexibility and core strength. Start by practicing the wheel pose against a wall for support. As you gain confidence, gradually move away from the wall until you can perform the pose without assistance.
Remember, mastering the backbend takes time and dedication. Listen to your body and avoid pushing yourself too hard. With patience and perseverance, you'll eventually achieve this graceful and challenging pose.
- How to Improve Your Flexibility and Mobility with Gymnastics
- The Best Gymnastics Exercises for Core Strength
- How to Do a Backflip
IV. Nailed the Forward Roll: Coordination and Control
Nailed the Forward Roll: Coordination and Control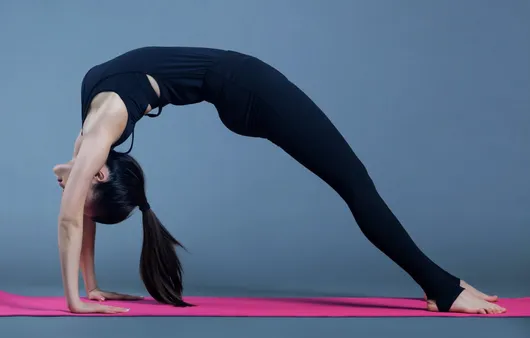
Mastering the forward roll is a fundamental skill in gymnastics that requires coordination, control, and a touch of bravery. This dynamic move involves tucking your body into a ball and rolling forward, landing smoothly on your feet. As you progress in your gymnastics journey, the forward roll becomes the foundation for more advanced skills like handsprings and somersaults.
To achieve a perfect forward roll, start by standing with your feet shoulder-width apart and your arms at your sides. Bend your knees slightly and tuck your chin to your chest. Swing your arms forward and upward, then tuck your head and bring your knees to your chest. Continue rolling forward, keeping your body tight and your chin tucked. As you reach the end of the roll, extend your legs and arms and land softly on your feet.
Here are some tips for nailing the forward roll:
- Start slowly and gradually increase your speed as you become more comfortable with the movement.
- Keep your body tight and your chin tucked throughout the roll.
- Don't be afraid to commit to the roll. The more you hesitate, the more likely you are to lose your balance.
- Practice regularly to improve your coordination and control.
Once you've mastered the forward roll, you can start to incorporate it into more advanced gymnastics skills. For example, you can try linking together multiple forward rolls to create a forward roll series. You can also try combining the forward roll with other skills, such as handstands and cartwheels.
The forward roll is a versatile skill that can be used in a variety of gymnastics routines. With practice, you'll be able to perform this move with confidence and grace.
If you're looking for more information on how to master the forward roll, check out our article on How to Do a Forward Roll.
V. Common Mistakes to Avoid
There are a few common mistakes that beginners often make when performing the forward roll. These mistakes can lead to injuries, so it's important to avoid them.
- Not tucking your chin: This is one of the most common mistakes. If you don't tuck your chin, you're more likely to hit your head on the ground and injure yourself.
- Not keeping your body tight: If you don't keep your body tight, you're more likely to lose your balance and fall.
- Hesitating: The longer you hesitate, the more likely you are to lose your balance and fall. Commit to the roll and don't look back.
- Not practicing regularly: The more you practice, the better you'll become at performing the forward roll. Make sure to practice regularly to improve your coordination and control.
By avoiding these common mistakes, you can safely and successfully master the forward roll.
If you're looking for more information on how to avoid common mistakes when performing the forward roll, check out our article on The Most Common Gymnastics Injuries and How to Prevent Them.
VI. Conclusion
As you embark on your gymnastics journey, remember that progress is a gradual process. Embrace challenges as opportunities for growth, and celebrate your achievements along the way. With dedication, perseverance, and the guidance of experienced coaches, you can unlock your full potential and soar to new heights. Gymnastics is more than just a sport; it's a transformative experience that builds strength, confidence, and a lifelong appreciation for physical fitness. Seize this opportunity to embark on an empowering journey of self-improvement and discover the boundless possibilities that await you in the world of gymnastics.