Table of Contents
Have you ever wanted to learn How to do a handstand? This impressive feat of strength and balance may seem intimidating at first, but with the right technique and practice, it's achievable for anyone. In this comprehensive guide, we'll break down the steps involved in doing a handstand, from warm-up to execution, and provide tips and variations to help you master this challenging pose. Whether you're a beginner or looking to improve your handstand skills, Kizworld has you covered.
How to Do a Handstand: A Step-by-Step Guide to Mastering the Inversion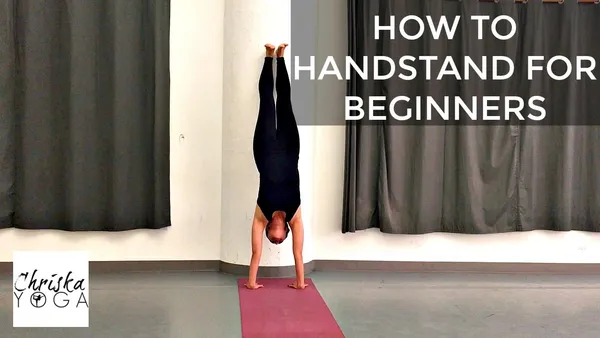
I. Mastering the Art of Handstands: A Comprehensive Guide
Mastering the Art of Handstands: A Comprehensive Guide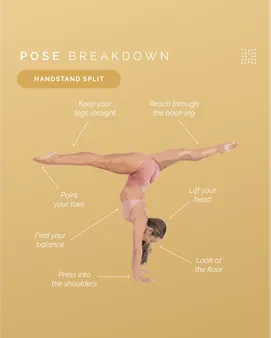
Benefits of Handstands
- Improved balance and coordination
- Increased strength and flexibility
- Reduced risk of injury
- Improved posture
- Enhanced mental focus and concentration
How to Do a Handstand
Step 1: Warm Up
Start with a dynamic warm-up to prepare your body for the handstand. This could include exercises like arm circles, shoulder rolls, and leg swings.
Step 2: Find a Spot
Choose a safe and open area with enough space to practice your handstand. A gym or yoga studio is a good option, but you can also practice at home if you have enough room.
Step 3: Position Your Hands
Place your hands on the floor shoulder-width apart, with your fingers spread wide. Your hands should be slightly turned out, with your thumbs pointing forward.
Step 4: Kick Up
Bend your knees and swing your legs up, using your arms to help you lift your body off the ground. Keep your core engaged and your legs straight as you extend them into a handstand.
Step 5: Hold the Handstand
Once you're in a handstand, hold the position for as long as you can. Focus on keeping your body straight and your balance steady. If you start to lose your balance, slowly lower yourself back to the ground.
Step 6: Come Down
To come down from a handstand, slowly bend your knees and lower your legs back to the ground. Keep your core engaged and your back straight as you lower yourself.
Tips for Beginners
- Start by practicing against a wall for support.
- Use a spotter to help you balance and prevent falls.
- Don't be afraid to fall. Everyone falls when they're first learning how to do a handstand.
- Be patient and persistent. It takes time and practice to master the handstand.
Common Mistakes to Avoid
- Rushing the kick-up. Take your time and focus on getting your body into the correct position before you kick up.
- Not engaging your core. Your core is essential for maintaining balance in a handstand. Keep your core engaged throughout the entire movement.
- Locking your knees. Keep your knees slightly bent to help you absorb shock and maintain balance.
- Looking down. Keep your eyes focused on a spot in front of you to help you maintain your balance.
Variations of the Handstand
- One-legged handstand
- Two-legged handstand with a pike
- Handstand push-ups
- Handstand holds with different arm positions
- Handstand walks
Handstand Workouts
There are many different handstand workouts that you can do to improve your strength, balance, and flexibility. Some popular handstand workouts include:
- Handstand holds: Hold a handstand for as long as you can, gradually increasing the duration of your holds over time.
- Handstand push-ups: Perform push-ups while in a handstand position.
- Handstand walks: Walk forward or backward while in a handstand position.
- Handstand drills: Practice different handstand variations and drills to improve your balance and control.
Safety Precautions
Before attempting a handstand, it's important to take some safety precautions to avoid injury. These precautions include:
- Warm up properly before practicing handstands.
- Use a spotter when you're first learning how to do a handstand.
- Practice in a safe and open area with enough space to fall.
- Listen to your body and stop if you feel pain.
With practice and patience, you can master the handstand and enjoy all the benefits it has to offer. So what are you waiting for? Start practicing today!
If you're looking for more information on how to do a handstand, check out our related posts on How to Do a Cartwheel, How to Do a Backflip, and How to Do a Split.
II. Building a Strong Foundation: Preparing Your Body for Handstands
Building a Strong Foundation: Preparing Your Body for Handstands
Warm Up Before You Handstand
Warming up your muscles before attempting a handstand is crucial to prevent injuries and improve your performance. Start with light cardio to increase your heart rate and blood flow. Incorporate dynamic stretches that target the muscles involved in handstands, such as shoulders, wrists, and core. Use a foam roller to release tension and improve flexibility.
- Dynamic stretches target specific muscle groups and prepare them for the handstand.
- Foam rolling helps release muscle tension and improves flexibility.
Choose a Safe Spot to Practice
Select a safe and suitable spot to practice your handstands. Ensure the ground is even, stable, and non-slip. If you're indoors, use a yoga mat or carpet to provide extra cushioning. If you're practicing outdoors, choose a grassy area or soft sand.
Indoors | Outdoors |
|---|---|
Yoga mat | Grass |
Carpet | Sofe sand |
Related: How to Choose the Right Spot for Handstands
Position Your Hands Correctly
Proper hand placement is essential for a stable and balanced handstand. Place your hands shoulder-width apart, fingers spread wide. Align your knuckles with your shoulders and press your palms flat against the ground. Keep your wrists straight and avoid bending them.
- Hand placement should be shoulder-width apart.
- Fingers should be spread wide.
- Keep wrists straight and avoid bending.
Kick Up into a Handstand
To kick up into a handstand, start with your hands planted firmly on the ground and your feet together. Bend one knee and use the momentum to swing your other leg up. Once your top leg is straight, use a powerful kick to propel yourself into a handstand. Keep your core engaged and your body straight.
- Bend one knee.
- Use momentum to swing the other leg up.
- Use a powerful kick to propel yourself.
- Keep core engaged and body straight.
Hold the Handstand
Once you're in a handstand, hold the position for as long as you can. Focus on maintaining a straight line from your head to your toes. Engage your core and keep your legs together. Breathe deeply and control your balance. As you progress, gradually increase the hold time.
Related: How to Hold a Handstand with Proper Form
Come Down Safely
When you're ready to come down from the handstand, slowly bend your arms and lower your body back to the ground. Control the descent and avoid putting too much stress on your wrists. As you approach the ground, bend your knees to cushion the landing.
- Slowly bend your arms.
- Lower your body back to the ground.
- Control the descent.
- Bend knees to cushion the landing.
Remember, handstands require patience and practice. Focus on building a strong foundation, and with persistence, you'll be able to master this challenging pose.
III. Executing the Handstand: Step-by-Step Instructions
Executing the Handstand: Step-by-Step Instructions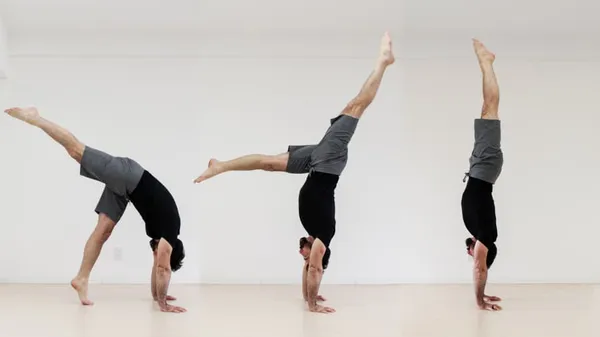
Step 1: Warm Up
Before attempting a handstand, it's crucial to warm up your body to prevent injuries. Start with some light cardio exercises, such as jogging or jumping jacks, to get your heart rate up. Then, focus on stretching your wrists, shoulders, and back. This will help prepare your muscles for the inverted position of the handstand.
- Related Post: The Best Warm-Up Exercises for Handstands
Step 2: Find a Spot
Choose a safe and open area to practice your handstand. Make sure the surface is flat and free of any obstacles. If you're a beginner, it's best to start practicing against a wall for support.
- Related Post: How to Choose the Right Spot for Handstands
Step 3: Position Your Hands
Place your hands shoulder-width apart on the floor, with your fingers spread wide. Your hands should be slightly turned out, so that your thumbs are pointing slightly forward. Press your palms flat against the floor and engage your core to create a strong foundation.
- Related Post: How to Position Your Hands Correctly for Handstands
Step 4: Kick Up
To initiate the handstand, start by bending your knees and bringing your feet close to your butt. Then, swing your legs up and over your head, using the momentum to lift your body into an inverted position. Keep your core engaged and your legs straight as you extend them towards the ceiling.
- Related Post: How to Kick Up into a Handstand
Step 5: Hold the Handstand
Once you're in the handstand position, hold it for as long as you can. Focus on keeping your body straight and your core engaged. If you start to feel unstable, slowly lower yourself back to the ground.
- Related Post: How to Hold a Handstand for Longer
Step 6: Come Down
To come down from the handstand, slowly bend your knees and bring your feet back to the ground. Control the descent by engaging your core and lowering yourself gradually. Once your feet are on the ground, stand up and shake out your arms and legs.
- Related Post: How to Come Down from a Handstand Safely
IV. Tips for Beginners
Here are some tips for beginners who are learning how to do a handstand:
- Start by practicing against a wall for support.
- Focus on warming up your body before attempting a handstand.
- Keep your core engaged and your body straight throughout the movement.
- Don't be afraid to fall. Everyone falls when they're first learning how to do a handstand.
- Be patient and persistent. It takes time and practice to master the handstand.
V. Common Mistakes to Avoid
Here are some common mistakes that beginners make when learning how to do a handstand:
- Not warming up properly.
- Attempting a handstand without proper instruction.
- Rushing the movement.
- Not engaging the core.
- Not keeping the body straight.
- Being afraid to fall.
VI. Variations of the Handstand
Once you've mastered the basic handstand, you can try some variations to challenge yourself and improve your skills.
- One-legged handstand: This variation involves holding the handstand with only one leg extended.
- Straddle handstand: This variation involves holding the handstand with your legs spread wide apart.
- Tuck handstand: This variation involves holding the handstand with your knees tucked into your chest.
- Pike handstand: This variation involves holding the handstand with your legs extended straight up in the air.
- Handstand push-ups: This variation involves performing push-ups while in the handstand position.
VII. Handstand Workouts
Here are some sample handstand workouts that you can try:
- Beginner handstand workout: This workout is designed for beginners who are just starting to learn how to do a handstand.
- Intermediate handstand workout: This workout is designed for intermediate handstanders who are looking to improve their skills.
- Advanced handstand workout: This workout is designed for advanced handstanders who are looking to challenge themselves and take their skills to the next level.
VIII. Safety Precautions
It's important to take safety precautions when practicing handstands to avoid injuries.
- Always warm up before attempting a handstand.
- Start by practicing against a wall for support.
- Don't rush the movement.
- Engage your core and keep your body straight throughout the movement.
- Be aware of your surroundings and make sure there are no obstacles in your way.
- If you feel pain, stop immediately and consult a doctor.
IX. Troubleshooting Common Handstand Challenges
Troubleshooting Common Handstand Challenges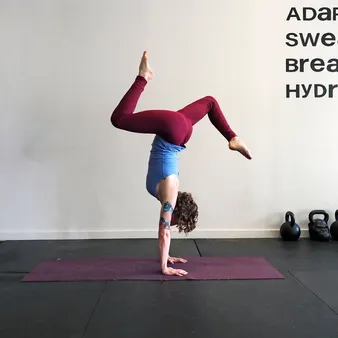
Despite following the step-by-step guide, several factors can affect your ability to achieve a proper handstand:
- Insufficient Warm-up: Inadequate warm-up can lead to muscle imbalances and increased risk of injury. Ensure a thorough warm-up routine to prepare your body for the strenuous handstand position.
- Improper Hand Positioning: The placement of your hands is crucial. Check if your hands are shoulder-width apart, your fingers are spread wide, and your weight is evenly distributed on both hands.
- Fear and Mental Blocks: Fear and anxiety can inhibit your ability to commit to the handstand. Focus on relaxation techniques, such as deep breathing, and gradually work to overcome your fears with practice.
Problem | Possible Reason | Remedy |
|---|---|---|
Shaking Hands | Weak Hand Muscles | Strengthen hand muscles with exercises like wrist curls, finger curls, and grip exercises. |
Loss of Balance | Poor Core Strength | Strengthen core muscles with exercises like planks, sit-ups, and leg raises. |
Can't Hold the Position | Insufficient Shoulder Strength | Enhance shoulder strength with exercises like shoulder presses, lateral raises, and front raises. |
- Lack of Strength: Handstands require significant arm, core, and shoulder strength. If you struggle to hold the position, incorporate strength-training exercises into your routine to improve your overall strength.
- Incorrect Spotting: Having a spotter is crucial for safety, but improper spotting techniques can hinder your progress. Ensure your spotter understands the proper way to assist you.
- Rushing the Process: Mastering the handstand takes time. Avoid rushing your progress; instead, focus on building a solid foundation and gradually work towards more advanced variations.
Remember that learning the handstand is a journey that requires patience and perseverance. Keep practicing, listen to your body, and you'll eventually achieve a stable and beautiful handstand. If you're experiencing ongoing difficulties, consider seeking guidance from a qualified gymnastics instructor or trainer who can provide personalized advice and support.
Related Posts:
- How to Do a Backflip: A Step-by-Step Guide
- The Benefits of Martial Arts for Physical and Mental Health
- How to Choose the Right Snowboard for Your Skill Level and Style
- Surfing for Fitness and Fun: The Benefits and How to Get Started
- Building Muscle and Strength with Calisthenics: A Bodyweight Training Guide
- How to Choose the Right Skateboard for Your Skill Level and Style